Organising presets
Groups
Every preset belongs to a group. If you don’t assign one when saving, it goes into My Presets (the default group).
To create a new group, type a new name in the Group field when saving or editing a preset. The group is created automatically — there’s no separate “create group” step.
Groups appear as collapsible sections in your preset list, each with a header showing the group name and preset count. Click the header to collapse or expand a group.
Renaming groups
- Click Edit (the pencil icon in the top-right of the preset list).
- Click the pencil icon next to the group name you want to rename.
- Type the new name and press Enter.
All presets in that group are updated automatically.
Reordering presets
- Click Edit to enter edit mode. You’ll see drag handles (⋮⋮) appear on each preset card.
- Drag a preset up or down within its group, or drag it into a different group entirely.
- Click Done when you’re finished.
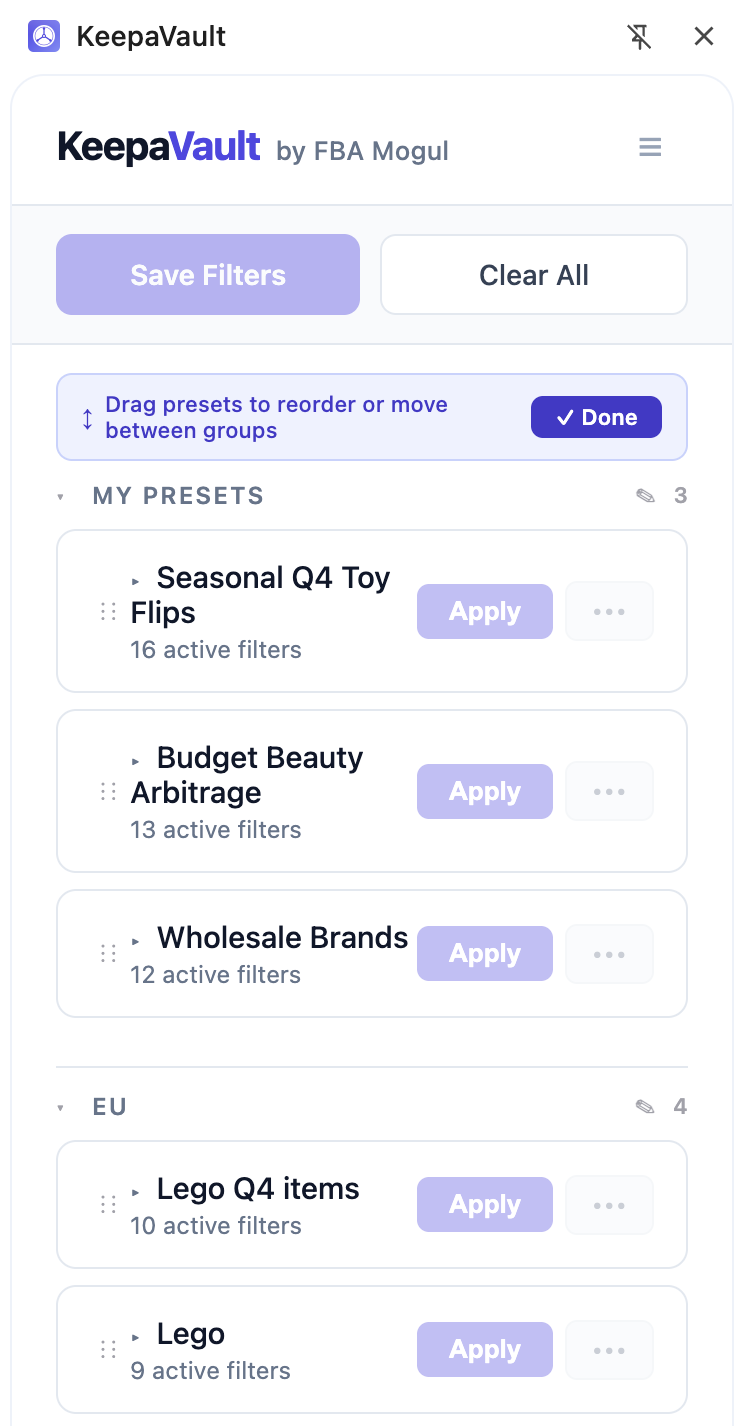
Your custom order is saved to the server and synced across all your browsers.
Cloning a preset
- Click the ⋯ menu on the preset you want to clone.
- Click Clone.
A copy is created with the same name plus ” (copy)” and the same filter values. You can then edit the name, description, group, or filter values independently.
Editing a preset
To change a preset’s name, description, or group:
- Click the ⋯ menu on the preset.
- Click Edit.
- Update the fields you want to change.
- Click Save.
To update the filter values inside a preset, set up the filters you want on Keepa, click Save Filters, then use the Or update existing dropdown to overwrite the preset.
Deleting a preset
- Click the ⋯ menu on the preset.
- Click Delete.
- Confirm the deletion.
Deleted presets are permanently removed from your account. This cannot be undone.